


~ Pointillism Pumpkin Paintings ~
Working on designs with my 1st – 3rd graders that incorporate the element of shape called the “dot”. So in keeping with this, we discussed pointillism art. I had the students look at artwork from Georges Seurat www.georgesseurat.org
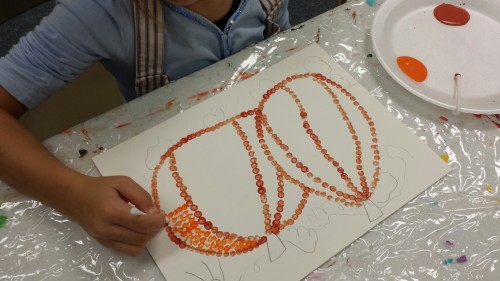
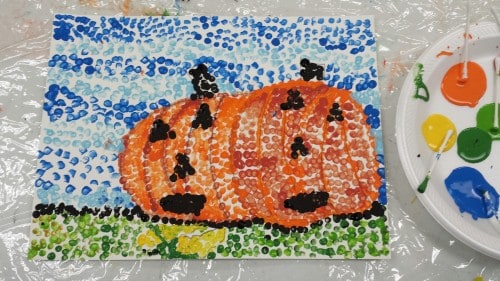
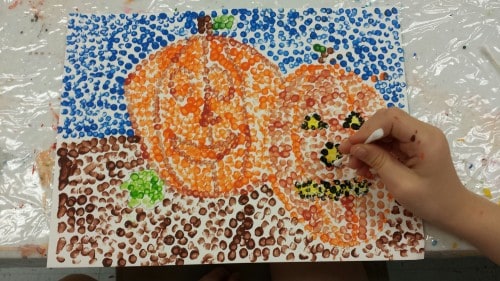
After explaining pointillism and looking at examples. I talked to the children about creating a Fall pumpkin scene using just dots. I gave them a 11×14 sheet of mixed media paper, had them place their name on the back and explained to them the importance of drawing their pumpkins (which are two big dots) large enough to take up most of the paper. In keeping the design simple to fill-in, I went over with the kids to just add a few other elements to their pumpkin picture (leaves, vines, clouds, the sun and faces to their pumpkins were what most of the kids ended up adding to their scene).

To make it easier for the 5 – 7 year old artist to paint their pointillism painting (make the dots), I gave them q-tips to dip in the paint. I even gave the children the option to use “one’ finger as their paint tool instead of the q-tip, but they all chose the q-tip (They seemed to enjoy using something other than a brush to create).
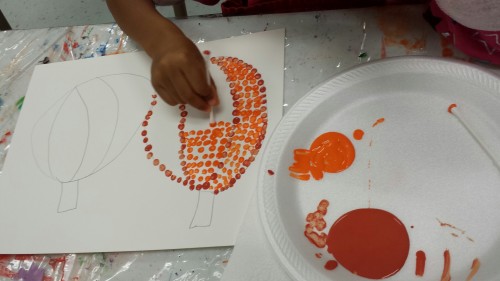
We used liquid acrylic paint. I started the kids off with just the pumpkin colors and then added more colors to their paint pallets (styrofoam plates) as they finished their pumpkins. I did this mainly to keep order with 20 children all painting at the same time (things can get a little messy with a lot of paint options)! Also, with the limited time in a class setting, the kids are able to get more done when they focus on one thing at a time.
A few students completed their pumpkin painting in two (50 minute) class sessions, but most took three classes to finish.
These are perfect for the Fall…the kids were excited to see their completed pointillism masterpiece!