


Milk Paint Makeover

I love paint…it transforms things and performs makeover miracles on objects that otherwise would be discarded. This trashed piece becomes a treasure after being cleaned up with a milk bath. 🙂
WHAT YOU NEED TO GET STARTED:
Item to paint (porous items work best – bare wood).
Milk Paint
Extra Bond (optional)
Gloves (milk paint adheres/sticks to the skin)
Painters Tape
Scissors
Paper/Newspaper
Sponge Brushes
Old Mixing Bowl/Container (you can discard or only use for paint projects)
Something to mix the paint (spatula-only for paint use)
Water (warm works best with milk paint)
Measuring Cups (only for paint use)
Sandpaper
Twine (optional)

On this particular piece, I decided to try my hand at using milk paint. Mainly, because I wanted an old fashion look to this chalkboard that I picked up at a yard sale. Plus, I recently purchased Milk Paint in the color “slate” that I could not let another day go by without trying it!
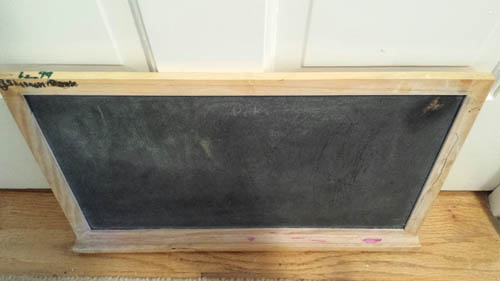
Before giving it a coat of the slate milk paint, I decided to touch up the chalkboard with chalkboard paint.

After the chalkboard paint thoroughly dried (30 minutes), I used painters tape to protect it from the milk paint (Also, I covered the middle part of the chalkboard with paper to keep it from getting any drips (I’m a messy painter!). This entire step could be done after painting the wood with the milk paint. However, I was not sure how the tape would react with the milk paint and it is easier to refinish the chalkboard if the tape peeled any of the chalkboard paint off.


I mixed the Milk Paint according to the instruction inclosed with the paint (I recommend reading all the instructions before using the milk paint).

Since the board had marks on it with markers and crayons, I added extra bond (amount is in the instructions) to my paint once I had it mixed well. I continued mixing it until the bond was mixed into it (another 2 – 3 minutes).
With a sponge brush I added a layer of paint to the entire wood part of the chalkboard. After that was dry (25 minutes), I added a second coat.


After the milk paint dried (I let it dry overnight), I used heavy and fine grade sandpaper to distress the edges of the chalkboard. First, use the heavy to get the paint to chip off and smooth with the fine (Note: I took the painters tape off before this step. However, I should have left it on to help protect the chalkboard from scratching…I had to take my time to prevent this happening). 🙂


The board had hangers already attached to the back of it. Therefore, I used a twine cord and tied it to the hangers and secured the cord down with a staple gun. (Note: I made the twine cord by twisting three strands of twine together until it made one cord).

Next, the chalkboard needs to be conditioned before it is ready for any notes. This step helps prevent what is written on it from making a “lasting impression” on your board!
To condition it, take a piece of chalk and using the long side, coat the entire board with chalk.


Rub the chalk off using a chalkboard eraser or soft cloth (make sure to have good ventilation when performing this step since it does produce dust).

What a difference a coat (or two) of paint makes…love the transformation!!! 🙂


Post here if you give milk paint a try. Click here for further information on using Milk Paint.
As always, enjoy the happy made in life!
Michelle
A happy heart is good medicine…Proverbs 17:22