


Reptile Mix Media Creations (Day 2: Paper Designing)
In today’s art class, we continued creating our paper designs for the reptile scene we started a few weeks ago (due to a snow storm, class continued on February 21 & 28). See, Day 1 for the beginning lesson.
TURTLE PAPERS:
The class worked on creating their own paper designs to be used for the turtle. They used copy paper and acrylic paint to create the designs.
I Love all the fun green sheets of paper they created for their turtle shells!

Creating your own sheets of design paper is a fun, but messy process. Therefore, we used plastic table cloths to protect the tables (and old posters (left over from a church event) for placemats). In addition, each student had a sheet of wax paper over their placemats so their painted papers would be able to dry without getting stuck.
On Day 1 of the project, I gave a long demonstration on how to create your own paper designs. Before the other classes, I just give a quick demo on what is expected. Since they are 1st – 3rd grade students, I make my way around the classroom to assist each student and make sure they understand the process.

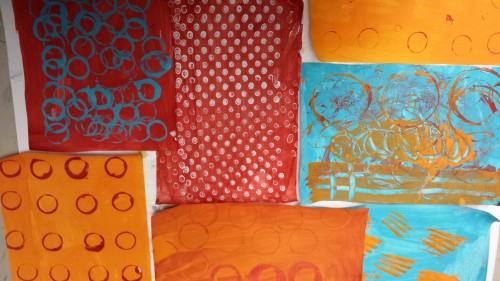
MORE FUN PAPERS CREATED FOR TURTLE SCENE:
The class worked hard on creating other colors that will go into creating their turtle scene. So many fun color combinations and design elements. I just love the creativity and can’t wait to see their reptile scenes come together in the next class.


Day 3: We will cut out our turtle shells and other design elements and use mod podge to glue everything in place. Looking forward to it…join us in a couple weeks for the finished scenes!
SUPPLIES:
Plastic Table Cloths
Old Cardstock Posters For A Placemat
Wax Paper
Copy Paper
Various Colors of Acrylic Paint
Sponge Brushes
Tools To Make Designs (stamps, popsicle sticks, old glue stick lids, forks, etc.)
02/28/2014 @ 4:50 pm
Work your magic Michelle!!!!
03/21/2014 @ 5:25 pm
Thank you Wanda for your support! So appreciate you joining in!