


Make Your Own Stamp

I wanted to make a lot of bookmark/gift tags with verses on them for events coming up this Spring and Summer. Although, making letters by hand is fun and rewarding in itself, I did not have the time to paint the words on each individual piece. Therefore, I thought I would experiment with making my own stamp.
Being a painter and crafter, I already had on hand a pink carving block. I had always wanted to try making a stamp, but never did. However, there’s no time the present to try!
What you will need is paper/sketchpad and pencil to create your design or message, tracing paper, some sort of carving block and linoleum cutters. The carving block and linoleum cutters were purchased at my local craft store using the store discount coupons (if you sign-up at your local craft store, they will email you coupons each week).
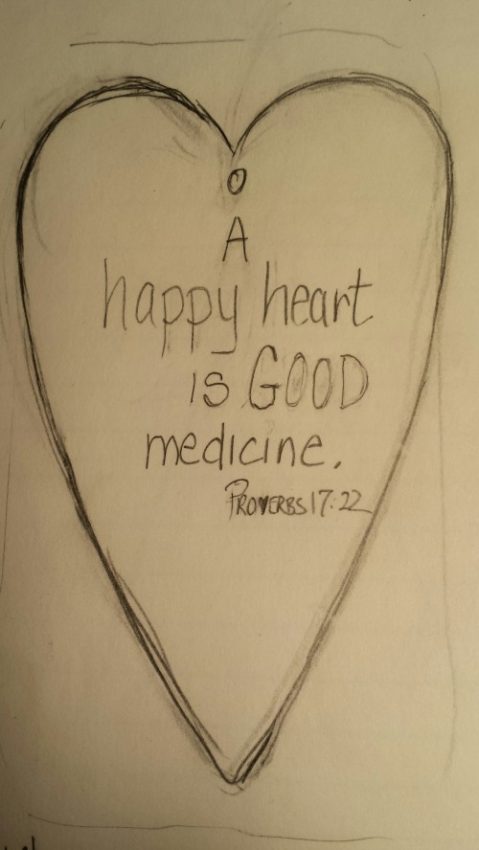
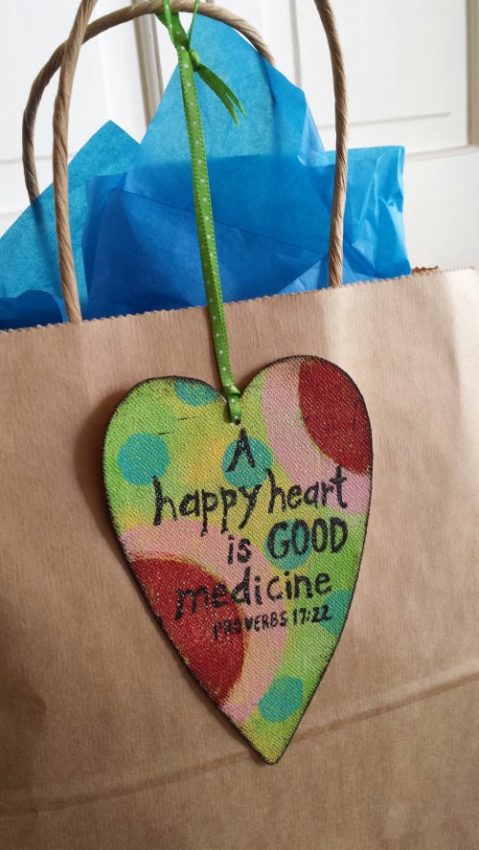
After writing out my message (“A happy heart is good medicine.” Proverbs 17:22) in my sketchpad, I found that tracing paper worked great to transfer my image onto the carving block. Since this was my first try, I kept the letters simple and gave enough space between each letter to be able to fit the small No.1 “V” blade.

I placed the tracing paper over what I designed and went over that exact image (filling it in on the tracing paper).
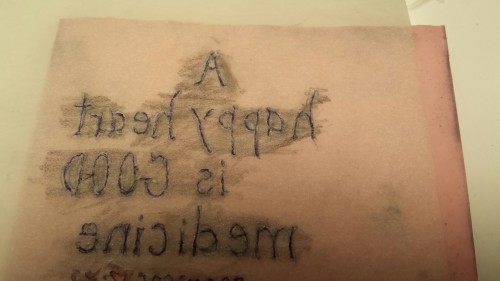
Then I flipped the image (tracing paper) over onto the top of the carving block (so what I just traced is now facing the block…making the image backwards). TRIAL: I was so excited to get the image onto the block, I forgot to flip it the first time and started tracing my verse the wrong way (therefore the scribbling of lead over the back of the tracing paper in trying to make it cover my letters to transfer…so remember to FLIP YOUR IMAGE onto your block!). 🙂
Go back over your exact image (letters) and the lead will transfer onto your block (after going back over your entire image, lift off the tracing paper. Your image will be on the block in reverse. I recommend placing a paper towel over your image and press down just once to blot some of the lead (to keep it from smudging as you carve). NOTE: If you freehand something onto your block, remember to do it in REVERSE and a pen does not smudge as much as a pencil (however, the pencil works best if using tracing paper to get the flipped image onto the pink carving block).

Okay, ready to carve! I placed my block on top of a manilla folder to catch the carvings (makes clean-up easier and faster to dump shavings in the trash). I used the “U” shape No. 5 blade to start carving away large areas of the block (see blades above). The pink block I used does not crumble and comes off very smoothly with the cutting tool.
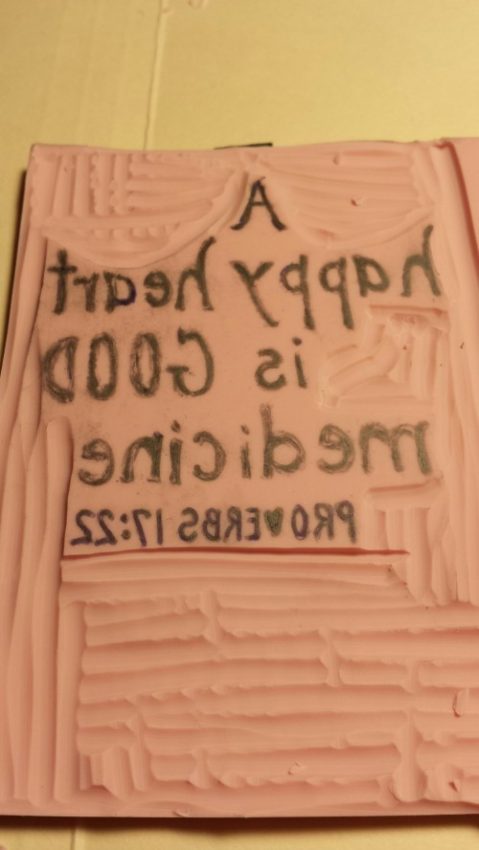
I changed out my blade and used the smaller “U” No. 3 blade and the “V” No. 2 blade to go between the words.

While carving, it’s important to keep in mind to carve away from yourself and to keep any fingers out of the way. Also, carve away from your letters so you do not accidentally cut into them or cut them off. Since, PROVERBS 17:22 was the smallest area to work with, I started there in carving between the spacing of the letters. I used the smallest “V” No.1 blade and took my time.

After my image was carved, I did not waste anytime trying it out. I used an ink pad I had on hand and gently rubbed it across my letters. What a thrill to see it transfer!

Because I wanted the image to transfer onto my canvas heart (card stock and material work great too) that I painted with acrylic paints, I used Tim Holtz’s Black Soot Distress Paint instead of an ink pad. The distress paint has a sponge applicator on top. I rubbed a thin layer of it onto a styrofoam plate (large enough area to cover the size of my stamp) and then dipped my stamp into it. It is possible to rub the applicator directly onto the stamp, but I would be careful not to let it fill up the crevasses between your letters.
Once I had the image transferred onto my heart, I placed a dot with a pencil at the top so I would be able to punch a hole in it to tie a ribbon onto it.

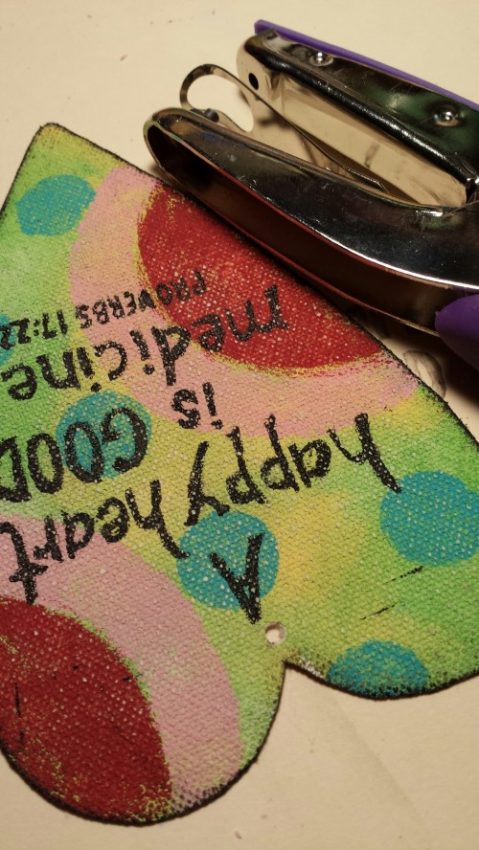
Add a string or ribbon and it is ready for use. Would make a great gift tag!
Works as a bookmark too!
